While rotating text in Microsoft Word isn’t difficult, it’s not fully apparent how to do it either. Here, we’ll show you how to rotate text in Word and the various options you have for the angle.
Insert a Text Box in Word
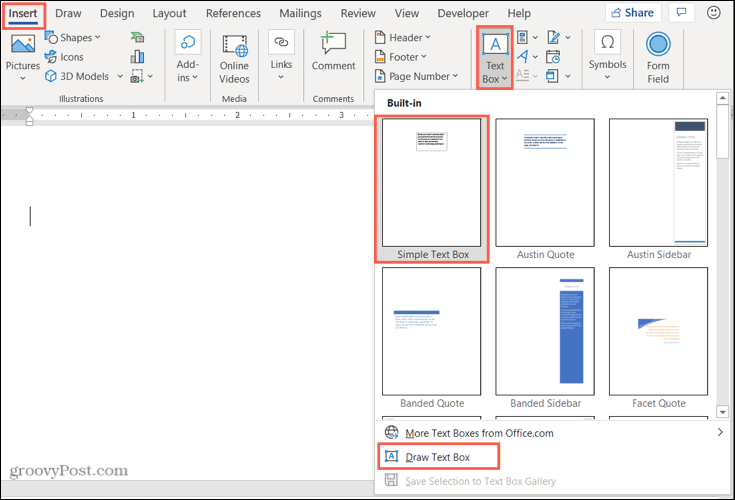
To rotate text in a Word document, you must place the text in a text box. On Windows, go to the Insert tab and use the drop-down arrow next to Text Box in the Text section of the ribbon. You can draw a text box or select the Simple Text Box option.
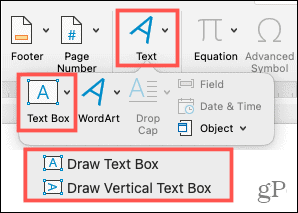
On Mac, go to the Insert tab and click the Text drop-down arrow. Then, click the Text Box arrow and choose to either Draw a Text Box or Draw a Vertical Text box.
After you insert the text box, type your text inside of it. Then, get ready to rotate it!
Rotate a Text Box in Word
You have a few different ways to rotate the text box with the text in it.
Use the Rotation Handle
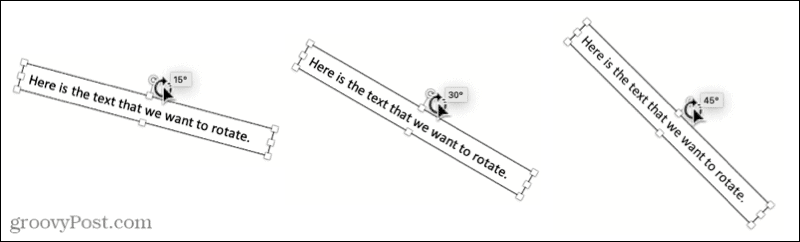
When you select the text box, you’ll see a rotation handle on the top. You can drag this handle left or right to rotate the text.
If you want to limit the flexibility in the rotation, hold your Shift key as you use the rotation handle. This will turn the text box 15 degrees at a time.
Use the Rotate Option in the Ribbon
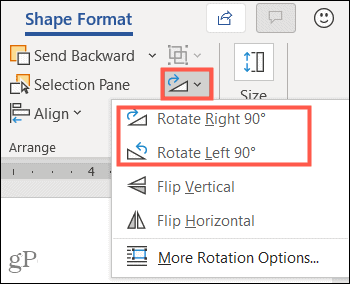
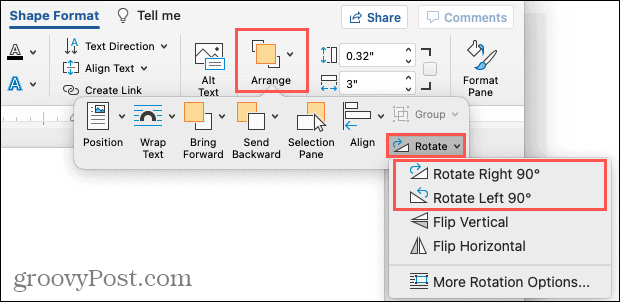
If you want to make a simple turn of the text box 90 degrees, you can do this with a tool in the ribbon. Select the text box and go to the Shape Format tab that displays. On Windows, click the Rotate Objects button in the Arrange section of the ribbon. Then, choose Rotate Right 90 Degrees or Rotate Left 90 degrees.
On Mac, click the Arrange drop-down arrow in the ribbon and then the Rotate arrow. Choose Rotate Right 90 Degrees or Rotate Left 90 degrees.
And if you want the text upside down, you can click one of those two options on Windows or Mac twice.
Set an Exact Rotation Angle
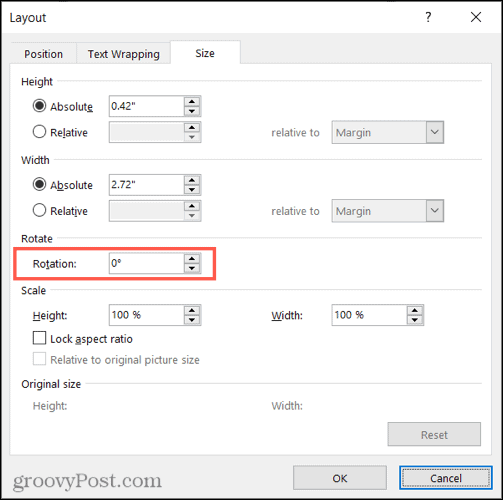
Maybe you have an exact angle that you want to use for your text rotation. You can add this in Word on both Windows and Mac. Open the Rotate option in the ribbon on the Shape Format tab as described above. Then select More Rotation Options.
In the Rotate section of the Layout box that appears, enter a number or use the arrows to increase or decrease the degrees for the angle next to Rotation. Click OK.
Note: After you rotate the text box, it will appear horizontally whenever you select it. This helps to make edits to the text a bit easier.
Remove the Text Box Border
It has a border by default when you draw or insert a text box in Word. This may be fine for your situation, but if you prefer to remove that border to show only the text inside, here’s how. Select the text box and go to the Shape Format tab. Click the Shape Outline drop-down arrow and pick No Outline.
Now, you’ll only see the text inside the box, which will appear in your document like your other text. If you select it, you’ll see a slight border to help you move, resize the box, or rotate it again.
Rotate Text to Any Angle in Word
Whatever your reason for wanting to turn your text to an angle, now you know just how easy it is to do in Microsoft Word. And if you’re working on a spreadsheet and want to spice it up, check out how to angle and rotate text in Excel. And for more, take a look at how to curve text in your Word document or how to shrink text to fit on one page. Comment Name * Email *
Δ Save my name and email and send me emails as new comments are made to this post.


![]()
