It provides a travel log of stunning background images taken from around the world on your Lock Screen. Many of these are desktop-worthy, too. Here’s how you can find and collect those pictures.
Find Windows Spotlight Lock Screen Pictures
Windows Spotlight Images are not stored in the most obvious of places. First, open your user folder, press Windows key + R, then type: %userprofile% and hit Enter.
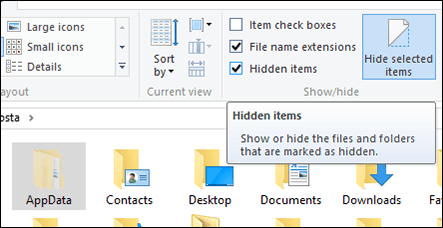
When File Explorer opens up, you’ll need to turn on Show hidden files and folders. Click the View tab, then check the box: Hidden items within the Show/Hide group.
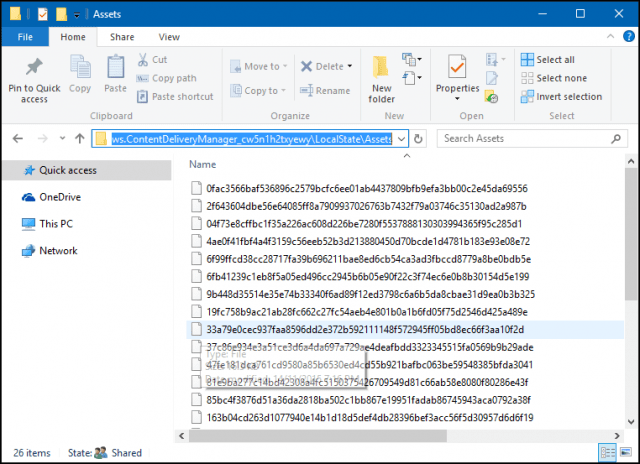
The AppData folder will now appear in your User folder. Open it then navigate to Local > Packages > Microsoft.Windows.ContentDeliveryManager_cw5n1h2txyewy > LocalState > Assets. The images will appear as blank files, select all of them Control + A then copy with Control + C. Create a new folder in your Documents folder or on the Desktop, then paste the files with Control + V.
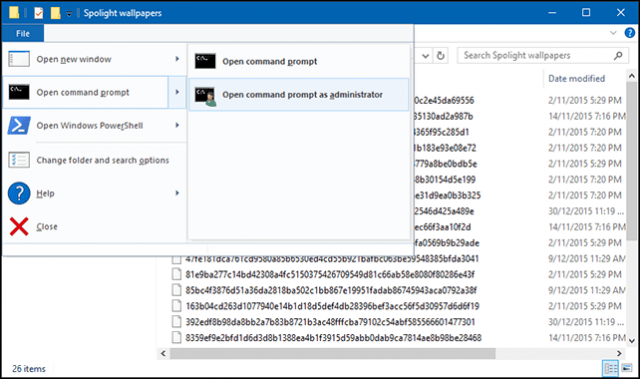
Open the folder containing the blank Files, click File menu > Open Command Prompt > Open Command Prompt as administrator.
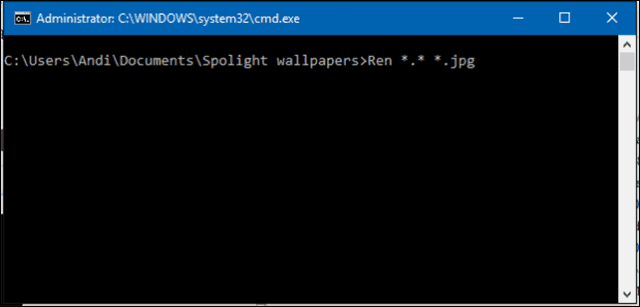
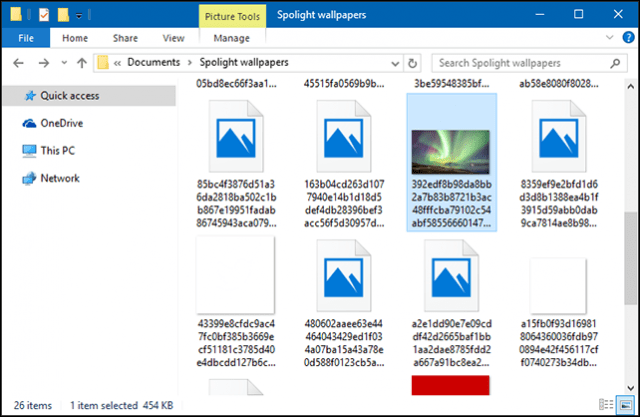
Type the following command: Ren . *.jpg and hit Enter. This batch command will convert the blank files to JPEG images and make them visible.
Your mileage might vary, though. I don’t know if it’s because I am using a limited data plan, why I don’t have many of these Spotlight images stored. Some of the files will be asset images used as resources for app icons; you can delete what you don’t need.
You can periodically check the folder for new images. If you want an easier way to obtain new wallpapers for your desktop, check out our article on downloading and installing Installing Windows Themes. However, you can skip the first couple steps by navigating to “%localappdata%” from the Run command. No need to turn on show hidden files either. Another useful power tip is to sort all the asset files by size and copy only the ones greater than 400 KB. Hope that helps. Cheers! However, the word, “convert”, is a misnomer; the files are actually in JPEG format already but they’re just missing the JPG extension. This command adds it back so that Windows can recognize the files as such. Good luck! Open the folder containing the blank Files, click File menu > Open Windows PowerShell > Open Windows PowerShell as administrator. Type the following PowerShell command to rename the files dir * | Rename-Item -NewName {$_.BaseName + “.jpg”} 1.Follow original instructions up to where you’ve moved the files to your newly named folder for them. 2.Click on ‘Date Modified’ 3.From the first file in the list, double click on it. When asked, select open with windows photo viewer 4.Assuming the lock screen pic is recent / current you should find it shortly down the list ( mine was the 6th ) 5.Note that in my case there were 2 versions of the pic I wanted….The first was too skinny looking so I kept clicking as per my method. Shortly after that I found the exact pic I wanted. hit windows icon on keyboard Type: cmd. in the command prompt (black Background with white text) type: “cd %userprofile%\AppData\Local\Packages\Microsoft.Windows.ContentDeliveryManager_cw5n1h2txyewy\LocalState\Assets” (without the quotes) or type: cd (PACEBAR and drag the folder to the text after cd) hit enter. then type: Ren . *.jpg Done… //since this works and has no effect on your system wallpaper.. this is not the location where some images are. to lazy to look for it further.. copy /Y “C:\Users\PROFILE_NAME\AppData\Local\Packages\Microsoft.Windows.ContentDeliveryManager_cw5n1h2txyewy\LocalState\Assets*” “C:\Users\PROFILE_NAME\Desktop\New Wallpapers*.jpg” Save the file., now every so often especially when you see a new Spotlight Wallpaper, simply double click and run the BAT/CMD file and check the New Wallpaper folder. pastebin.com/qwWj76cb Comment Name * Email *
Δ Save my name and email and send me emails as new comments are made to this post.
![]()
